Easy & fast pasting in coreldraw
- Open file & check RGB item & convert into CMYK.
- Convert RGB black into CMYK black
- See all pages & group it pagewise or you can powerclip it.
Just see below figure
- Bring all pages in pasteboard
- Power clip in print size rectangle box
- If PowerClip is not enable you can ungroup object & select object drage by mouse
- Edit PowerClip & grow extra bleed under powerclip & finish powerclip
Set page size in which paper size you want print. As i using 18 x 12". Drage guideline vertical & horizontal, select guideline & press ( p ) for center to page. See below figure.
Arrange page squance as you need (Front & Back, Work & Turn & Work & Tumble).
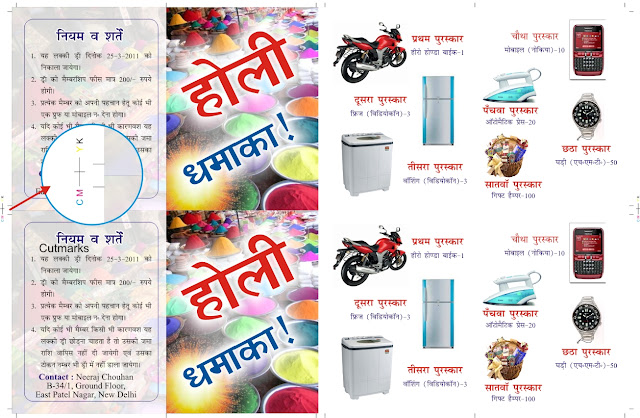
Cutmarks in layout- Set Nude Offset 0.25"

- Press key F5 (Freehand tool) & draw a line
- Give size (0.125") & set outline color C=100, M=100, Yellow=100 & Black=100.
- Select cut line & select top first object & press T & L (top align & left align)
- Now select cut line & press once top arrow key for mark position.
- Now press + key from numeric keypad for duplicate
- select duplicate cutmark & top IInd object together & press L for left align
- Do it till last
Open extra bleed in layout- Ungroup all objects
- select those object which pages you poweclip & pres Ctrl + Q for curve rectange.
- Press F10 key & select left side's point & press Left Arrow key.
- Do same in all side & bleed will open which in extra powerclip.
Place registration mark &
CMYK mark in vertical center in both side (Left & Right) for printing alignment as given in below : -
 |
| Click in image for large view |
Shortcut keys : Center to page ( p ), Left in object ( L ), Right in object ( R ), Top in object ( T ), Bottom in object ( b ).
Note :
- Group object first.
- First select which object u want align & than select another object that alignment you want.